개요
- 오브젝트(최상위)클래스에서 사용될 수 있는, clone() 에 대해 알아봅시다.
Clone() 메서드의 사용법
- Java Object 클래스의 clone() 메서드는 자바 언어에서 지원하는 객체 복사 메서드이고, 어떻게 생겼는지 실제 clone() 메서드를 살펴보자
protected native Object clone() throws CloneNotSupportedException;protected
같은 패키지안에서만 접근가능하거나, protected 클래스를 상속한 하위 클래스에서만 접근 가능 (내가 까먹었으니 다시 상기시키고 가겠다)
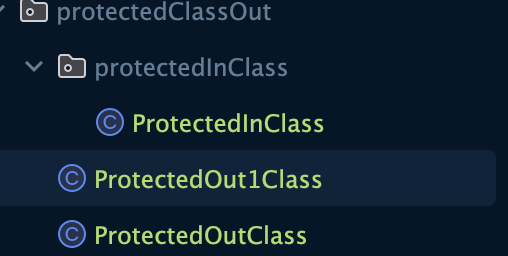
- ProtectedOutClass
package protectedClassOut;

import protectedClassOut.protectedInClass.ProtectedInClass;

public class ProtectedOutClass {
    protected long protectedOutClassId;
    ProtectedInClass pIn = new ProtectedInClass();
    ProtectedOut1Class pOut1 = new ProtectedOut1Class();

    protected void protectedOutClassMethod() {
        System.out.println("protectedOutClassMethod");
    }

    protected void protectedOutClassMethod2() {
        pOut1.protectedOutClassMethod();
    }
}- ProtectedOut1Class
package protectedClassOut;

public class ProtectedOut1Class {
    protected long protectedOut1ClassId;

    protected void protectedOut1ClassMethod() {
        System.out.println("protectedOut1ClassMethod");
    }

}
- ProtectedInClass
package protectedClassOut.protectedInClass;

import protectedClassOut.ProtectedOutClass;

public class ProtectedInClass {
    protected long protectedInClassId;
    ProtectedOutClass pOut = new ProtectedOutClass();

    protected void protectedInClassMethod() {
        System.out.println("protectedInClassMethod");
    }

    protected void protectedInClassMethod2() {

    }

}
ProtectedOutClass
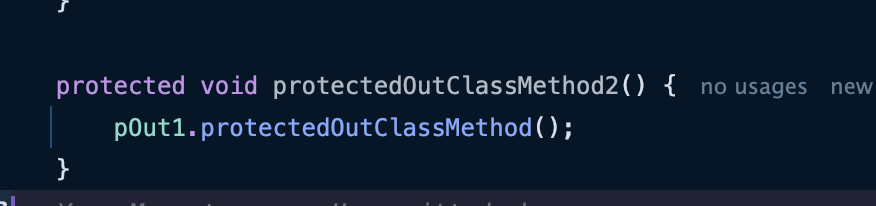
- 같은 패키지안에 있는 클래스는 접근이 잘 되는 모습이다.
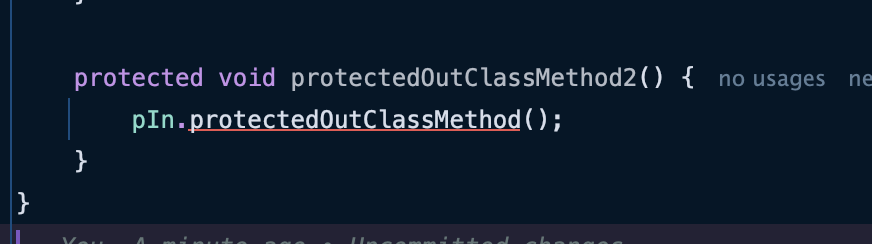
- 같은 패키지안에 있는 클래스가 아닌 하위 클래스에 있기 떄문에, 접근이 불가한 모습이다.

- ProtectedInClass 클래스를 하위패키지인 ProtectedOutClass에게 상속하게 변경
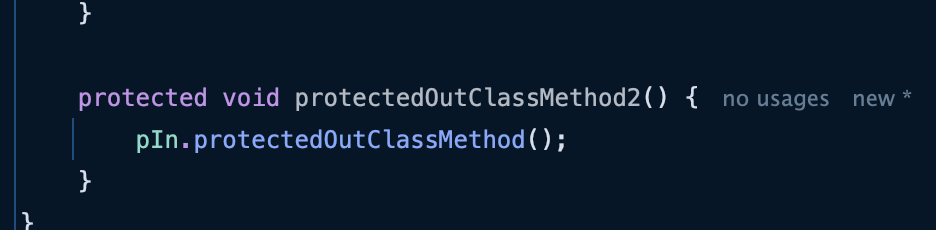
- 정상적으로 접근이 가능한 모습이다.
native
- 자바코드가 아닌 JVM 내부에서 C,C++로 실행되는 경우를 의미한다.
- 성능최적화 때문에 쓰인다고한다.
CloneNotSupportedException
- javadoc를 보면 알 수 있지만, java.lang.Cloneable 인터페이를 통해 구현하지않으면 오류가 발생되게 되어있다.
실제 사용예제
- 그렇다면 실제 사용 예시를 봐보자
package clone;

public class Apple {
    String color;
    int weight;

    public Apple(String color, int weight) {
        this.color = color;
        this.weight = weight;
    }

    public String getColor() {
        return color;
    }

    public int getWeight() {
        return weight;
    }

    public Apple clone() throws CloneNotSupportedException {
        return (Apple) super.clone();
    }
}
- Apple 클래스에 Cloneable 인터페이스를 implemnets 하지않고 바로 사용해보자
package clone;
public class Main {
public static void main(String[] args) throws CloneNotSupportedException {
Apple apple = new Apple("RED",100);
Apple cloneApple = apple.clone();
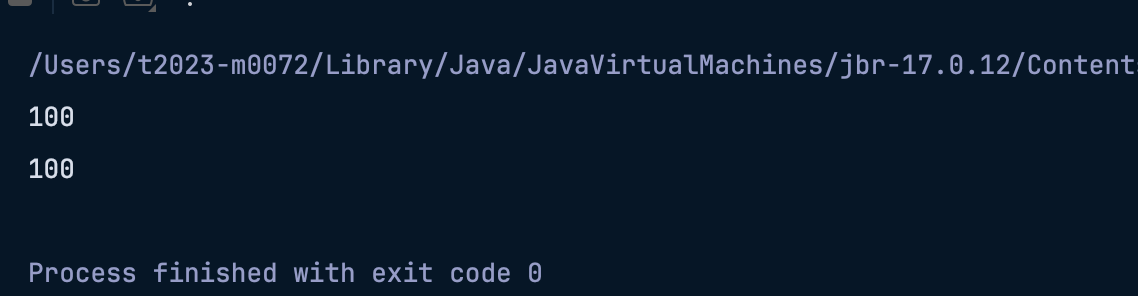
System.out.println(apple.getWeight());
System.out.println(cloneApple.getWeight());
}
}

- 음, 당연하게 예외가 터지는 모습이다.
- Cloneable 인터페이스를 implements 한후에는 잘되는 모습이다. (사진은 생략)
의문증 1: 현재 Apple 클래스는 아무것도 상속받지않았는데 어떻게 super 사용이 가능한가?
나의 예상:
- Apple 클래스역시 최상위 객체인 Object를 상속하고 있기 떄문에, clone이 가능한것같다
실제 정답:
- super.clone()을 호출할 수 있는 이유는 모든 클래스는 자동으로 Object 클래스를 상속받기 때문입니다.
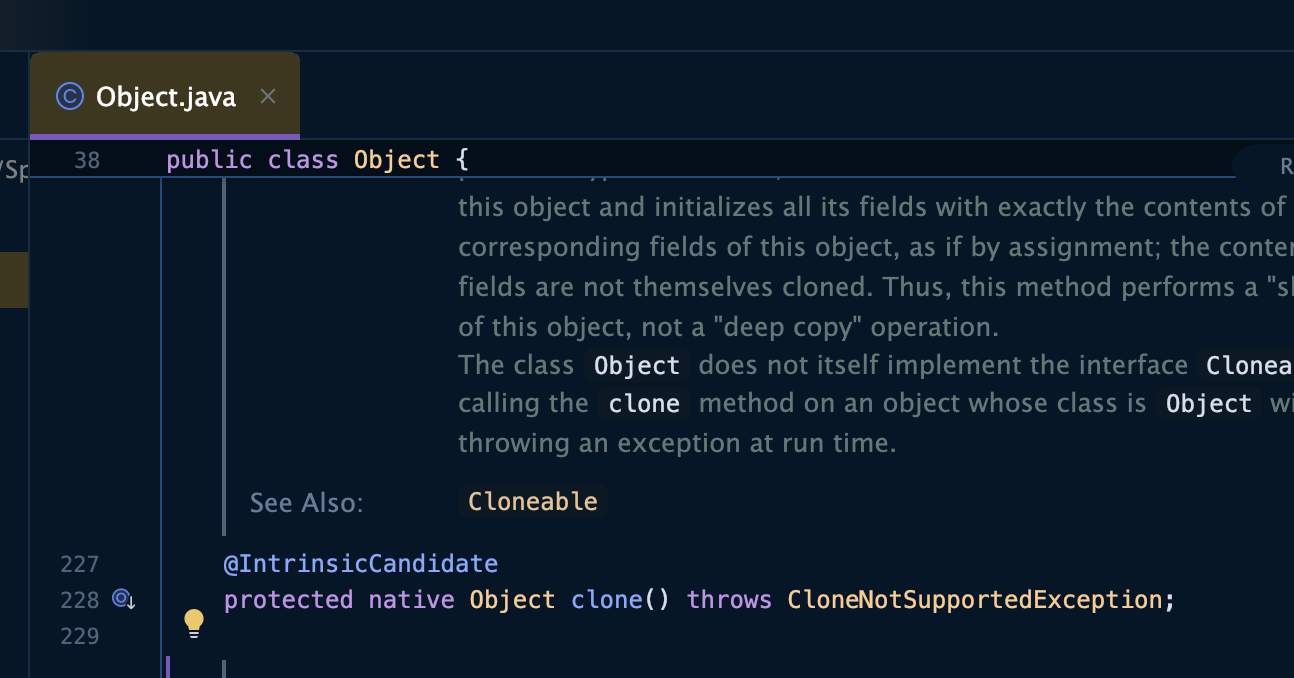
- 실제 오브젝트 클래스안에 clone()이 내장되어 있는 모습이다.
얕은복사 vs 깊은복사
얕은 복사:
- 객체의 필드 값을 그대로 복사하지만, 참조 타입(객체 타입) 필드는 주소값만 복사하는 방식
깊은 복사:
- 객체의 모든 필드를 새로운 객체로 복사하여 완전히 독립적인 복사본을 만드는 방식.
아래의 예제를 살펴보자
Home
package clone;

public class Home implements Cloneable {
    private String name;

    public Home(String name) {
        this.name = name;
    }

    public String getName() {
        return name;
    }

    public void setName(String name) {
        this.name = name;
    }
}- Human
package clone;

public class Human implements Cloneable {
    String name;
    int age;
    Home home;

    public Human(String name, int age, Home home) {
        this.name = name;
        this.age = age;
        this.home = home;
    }

    public String getName() {
        return name;
    }

    public void setName(String name) {
        this.name = name;
    }

    public int getAge() {
        return age;
    }

    public void setAge(int age) {
        this.age = age;
    }

    public Home getHome() {
        return home;
    }

    public void setHome(Home home) {
        this.home = home;
    }

    @Override
    public Human clone() throws CloneNotSupportedException {
        return (Human) super.clone();
    }
}- Main
package clone;
public class Main {
public static void main(String[] args) throws CloneNotSupportedException {
Human human1 = new Human("human1",1, new Home("human1home1"));
Human human2 = human1.clone();
System.out.println("human1.hashCode(): " + human1.hashCode());
System.out.println("human2.hashCode(): " + human2.hashCode());
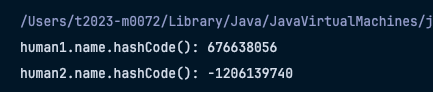
System.out.println("human1.name.hashCode(): " + human1.name.hashCode());
System.out.println("human2.name.hashCode(): " + human2.name.hashCode());
System.out.println("human1.home.hashCode(): " + human1.home.hashCode());
System.out.println("human2.home.hashCode(): " + human2.home.hashCode());
}
}
- 하나하나 봐보자
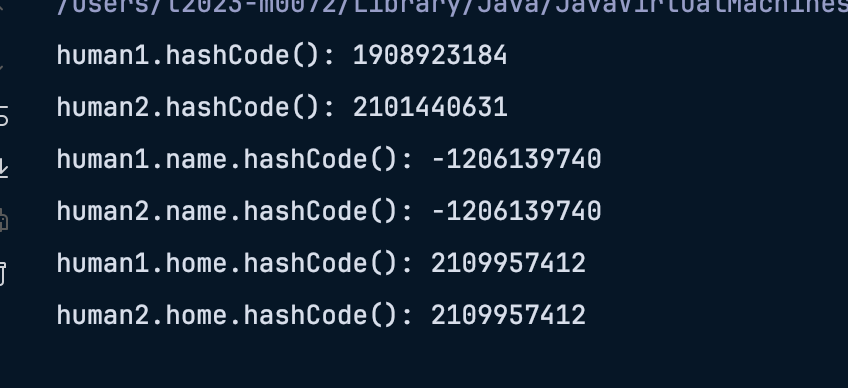
- human1,human2의 해시코드는 왜 다른가?
- clone의 경우 객체 자체는 새롭게 생성하기 떄문에 hashcode는 다르다
- human1,human2.name의 해시코드는 왜 같은가? (그리고 왜 - 인가?)
- hashcode의 구현체를 살펴보면 자료형이 int이기떄문에, 오버플로우로 인해 - 로 표기 가능성 있음
- name은 참조형 타입인 String의 필드 이기때문에 clone의 얕은복사로 인해 서로 같은 참조 메모리 주소값을 바라보고 있는 모습이다.
- human1,human2.home의 해시코드는 왜 같은가?
- Home도 참조형 타입이기떄문에, 얕은복사로인해 필드값인 Home은 clone될때 동일한 참조메모리 주소값을 바라보게 설정된 모습이다.
- human1,human2의 해시코드는 왜 다른가?
얕은 복사시 무슨 문제가 발생될 수 있을까?
- 서로의 객체는 별개의 객체이지만, 필드의 참조형타입은 같은 메모리주소값을 바라보고 있기 떄문에 아래와같은 문제가 발생될 수 있다.
package clone;

public class Main {
    public static void main(String[] args) throws CloneNotSupportedException {
        Human human1 = new Human("human1",1, new Home("human1home1"));
        Human human2 = human1.clone();

        human1.setName("updated Human");
        human1.setAge(999);
        human1.getHome().setName("updated Home");

        System.out.println("human1.getName(): " + human1.getName());
        System.out.println("human1.getAge(): " + human1.getAge());
        System.out.println("human1.getHome().getName(): " + human1.getHome().getName());
        System.out.println("human2.getName(): " + human2.getName());
        System.out.println("human2.getAge(): " + human2.getAge());
        System.out.println("human2.getHome().getName(): " + human2.getHome().getName());

    }
}
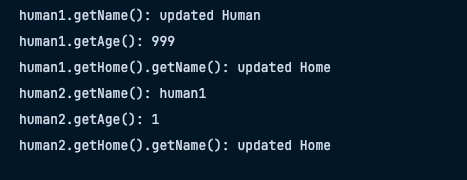
- human1의 각 프로포티의 값을 수정한 결과다, 하나하나 봐보자
- human1,human2의 getName()이 다른이유?
- 기본적으로 String은 불변하다. 따라서 SetName을 사용해 String 객체의 이름을 수정하면 updated Human이라는 새로운 참조 메모리 주소값이 생기고, human1은 그걸 바라보는 형태가 된다.
- human2의 getName()은 setName을 사용하기 이전의 참조메모리 주소값을 그대로 바라본다
- setName 하고나서의 hashcode가 달라진 모습이다.
- human1,human2의 age가 다른이유?
- age는 원시타입이기떄문에, 깊은복사가 작동되어 서로 별개로 작동되는 모습이다.
- human1,human2의 getHome().getName()이 같은이유?
- 현재 human1,human2의 home은 같은 참조 메모리 주소값을 바라보고 있는 상태
- 우리가 변경한건 같은 home객체 안에있는 Stirng filed인 name을 변경 하였기 때문에, 둘은 같은 name을 바라보게 되는것이다.
- human1,human2의 getName()이 다른이유?
오늘 나는 무엇을 알았는가?
- Stirng 객체는 불변하다
- 얕은복사를 했을떄 참조형 타입이라면, 메모리 주소값만을 복사한다.
참조문헌
'Java' 카테고리의 다른 글
| Map 자료구조에 대한 실험 (1) | 2025.02.24 |
|---|---|
| Java,Servlet, Jsp를 활용한 레거시 코드에 대해 이해해보자 - 3탄 (1) | 2025.02.07 |
| try-with-resources ? (1) | 2025.02.06 |
| Java,Servlet, Jsp를 활용한 레거시 코드에 대해 이해해보자 - 2탄 (1) | 2025.02.06 |
| Java,Servlet, Jsp를 활용한 레거시 코드에 대해 이해해보자 - 1탄 (0) | 2025.02.06 |